Want to update WordPress but don’t know where to start? Beginners often worry that an update might break their website.
This concern is understandable, but it’s important to use the latest version of WordPress to ensure optimal security and performance for your website.
In this beginner’s guide, we’ll show you how to safely update WordPress like a pro without breaking your website.
Why you should always update WordPress
Leading WordPress security research shows that the majority of hacked WordPress sites are due to outdated WordPress core, plugins, or outdated designs.
WordPress is actively maintained by developers from all over the world. These developers regularly find and fix bugs, add new features, and hunt for security holes. These changes are then published in the new WordPress version.
If it’s not a major version, WordPress can automatically update to a newer version. For major releases, unless you’re using managed WordPress hosting, you’ll have to manually initiate the update yourself.
You must update to ensure your site has the latest security patches, the latest features, and the best speed and performance.
For more on this topic, check out our guide on why you should always use the latest version of WordPress.
Let’s see how to safely update WordPress to the latest version
Before you upgrade WordPress
The most important thing to do before upgrading WordPress is to create a full WordPress backup.
Even if you set up an automatic WordPress backup plugin. You still need to make sure to create a new backup and store it securely in a remote location.
A full WordPress backup includes everything.
Your WordPress database
All images and media you upload
Your WordPress plugins and themes
Core WordPress files
This step is crucial because it allows you to restore WordPress from a backup in case something goes wrong.
Once the full backup is done and saved to another location (your computer or cloud storage like Google Drive), you can continue to the next step.
Update WordPress to the latest version
There are two easy ways to update your WordPress site to the latest version. One is automatic and the other is manual. We show both.
1st Method: Update WordPress using the built-in system (one-click)
This method is simpler and recommended for all users.
First, log into your WordPress site’s admin panel and go to Dashboard » Updates page.
You will see a notification that a new version of WordPress is available. Now all you have to do is click the “Update Now” button to start the update.
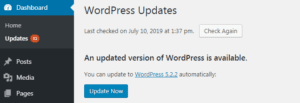
WordPress will now download and install the most recent version of the software for you.
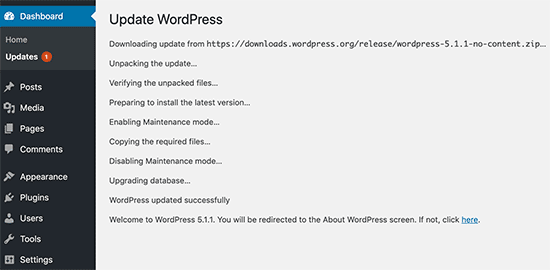
On your screen, you’ll see how far along the update is. WordPress will put your website into maintenance mode during the upgrade. During the update, you will not be able to install plugins or themes, but users will still be able to see your website.
You will be redirected to the WordPress welcome screen once the update is finished. There may be a page explaining what’s new in WordPress and which features you should try with each release.
That concludes the process of updating WordPress to the most recent version.
2nd Method : Uploading WordPress files manually via FTP.
FTP is required for this method of updating WordPress.
This can be used in situations where the first approach fails for various reasons.
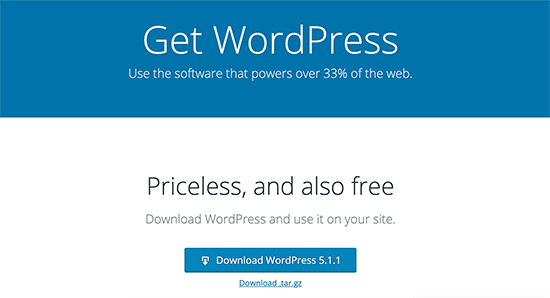
Downloading the most recent version of WordPress is the first step. Click the Download button on the WordPress download page.
Now, a zip file containing WordPress will be downloaded by your browser. The zip file must be extracted once downloaded. There is a folder for WordPress inside. All of the WordPress files you need for the update are in this folder.
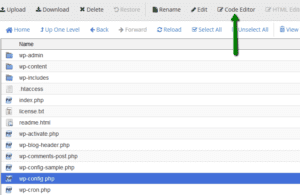
Open your FTP client and connect to your website after that. Go to the WordPress folder in the local files column that you just extracted from the zip file once you have connected. Navigate to the root folder of your website in the remote files column. The name of this folder could be public_html or the domain name of your website. Your WordPress files and folders will be in this folder.
Upload WordPress files by selecting all of the files in the computer’s wordpress folder with a right click and selecting Upload. WordPress files will now begin to be uploaded to your website by your FTP client.
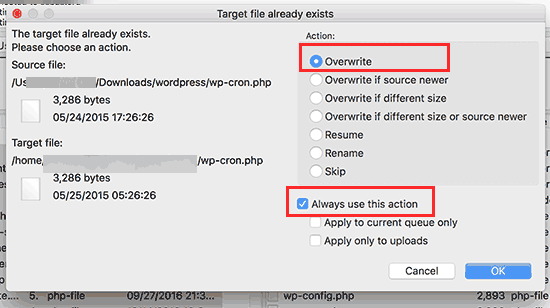
However, if you have older versions of the files with the same name are already available on your website. What you want to do with those files will be asked of you. Check the box next to “Always use this action” and select “Overwrite. ”
Overwrite files This will guarantee that the most recent versions of all WordPress files on your website are replaced.
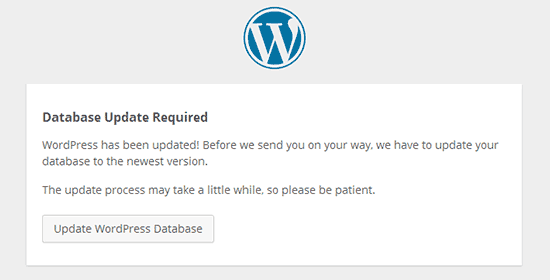
You must access your WordPress site’s admin area after the upload is complete. This step is necessary because sometimes your WordPress database needs to be updated by a newer version of WordPress.
In that case, you might see a page stating that a database update is necessary. To continue, select the “Update WordPress Database” button.
That’s all there is to it: your WordPress website has been updated successfully.
What should be done After The Update
Whenever you have updated WordPress on your site, you want to ensure that everything is functioning true to form. Simply open a new browser window on your website and review the Settings in the WordPress admin area.
Check out our list of common WordPress errors and how to fix them if you run into any problems. Follow the steps in our WordPress troubleshooting guide to identify the issue and implement a solution if it is not listed there.
We hope that this article made it simple for you to upgrade WordPress to the most recent version. Our step-by-step WordPress SEO guide for novices may also be of interest.