
Want to create a new WordPress page but don’t know where to start? Beginners sometimes get confused on how to add new pages and have them displayed on the website.
In this beginner’s guide, we’ll show you how to easily create a new page for your website.
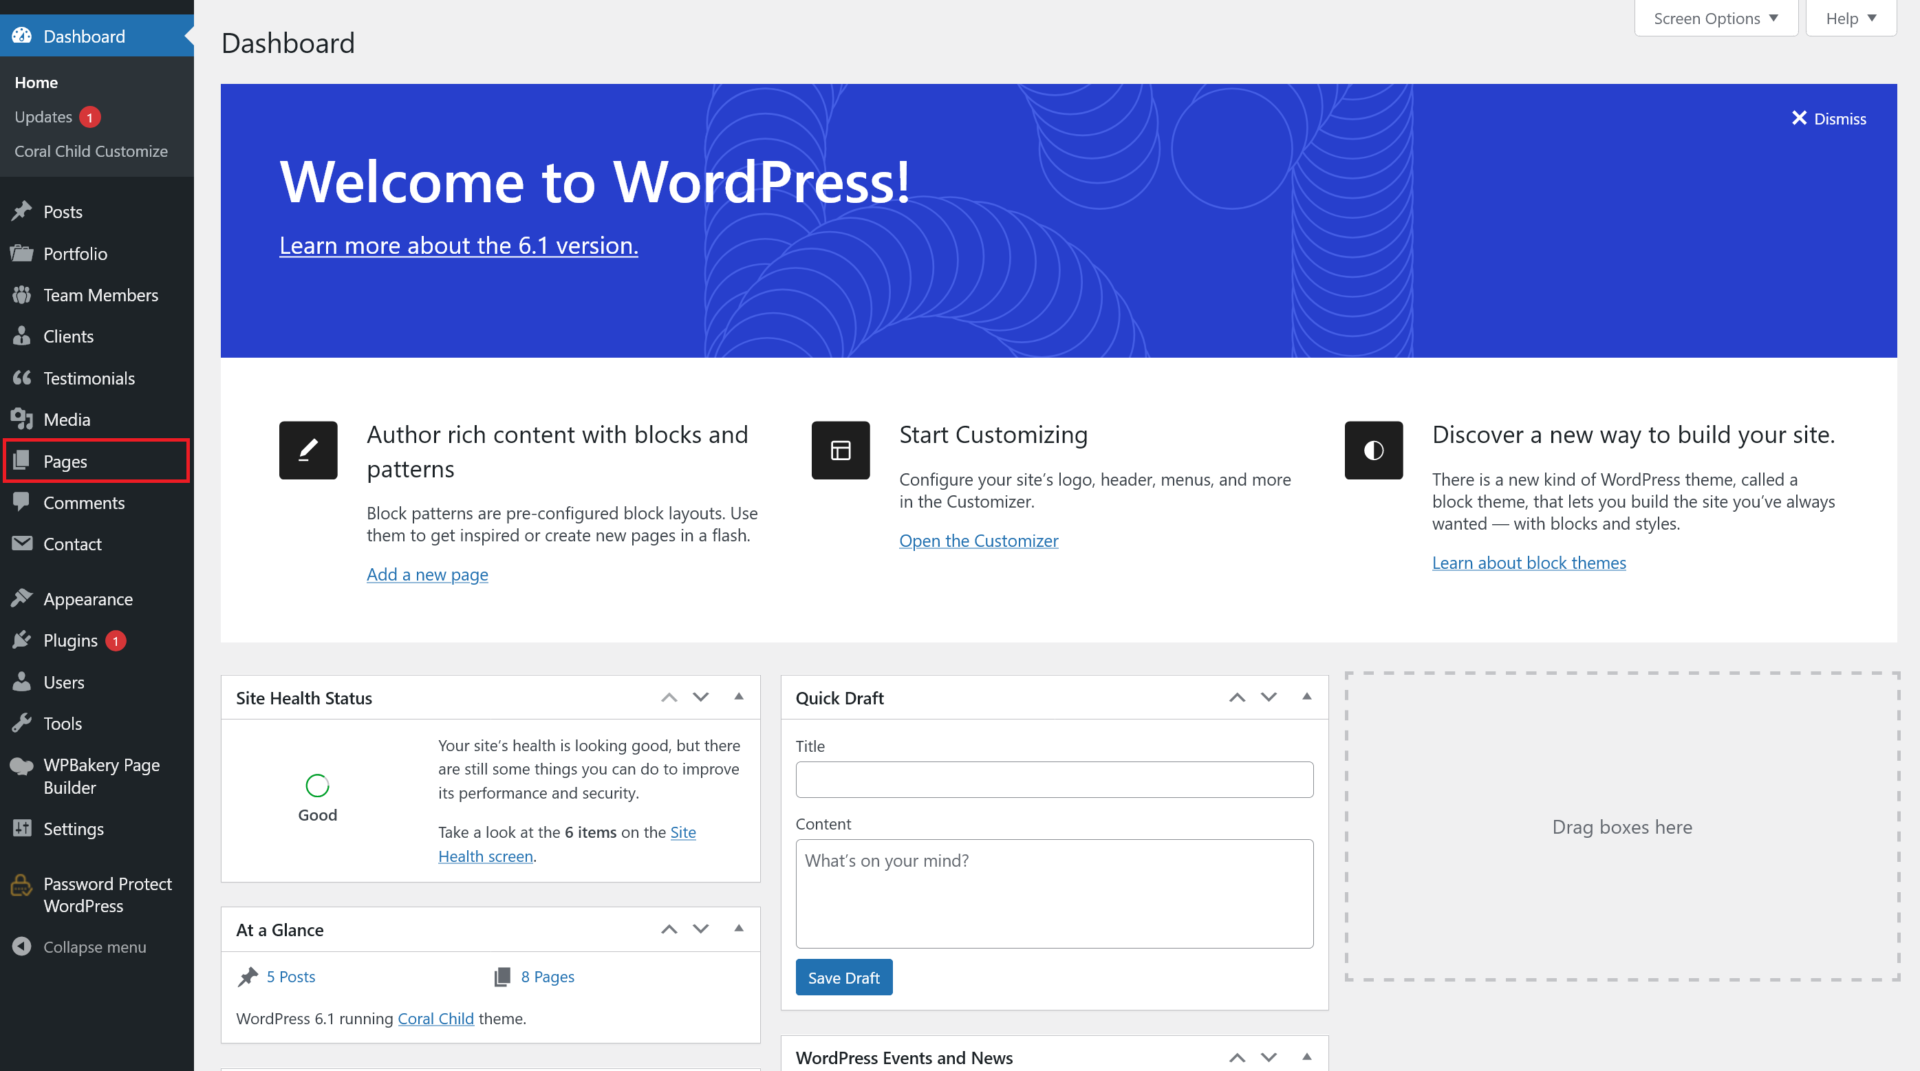
First, log into your WordPress site’s admin panel and go to Dashboard » Pages » Add New.
Title, Permalink & Content
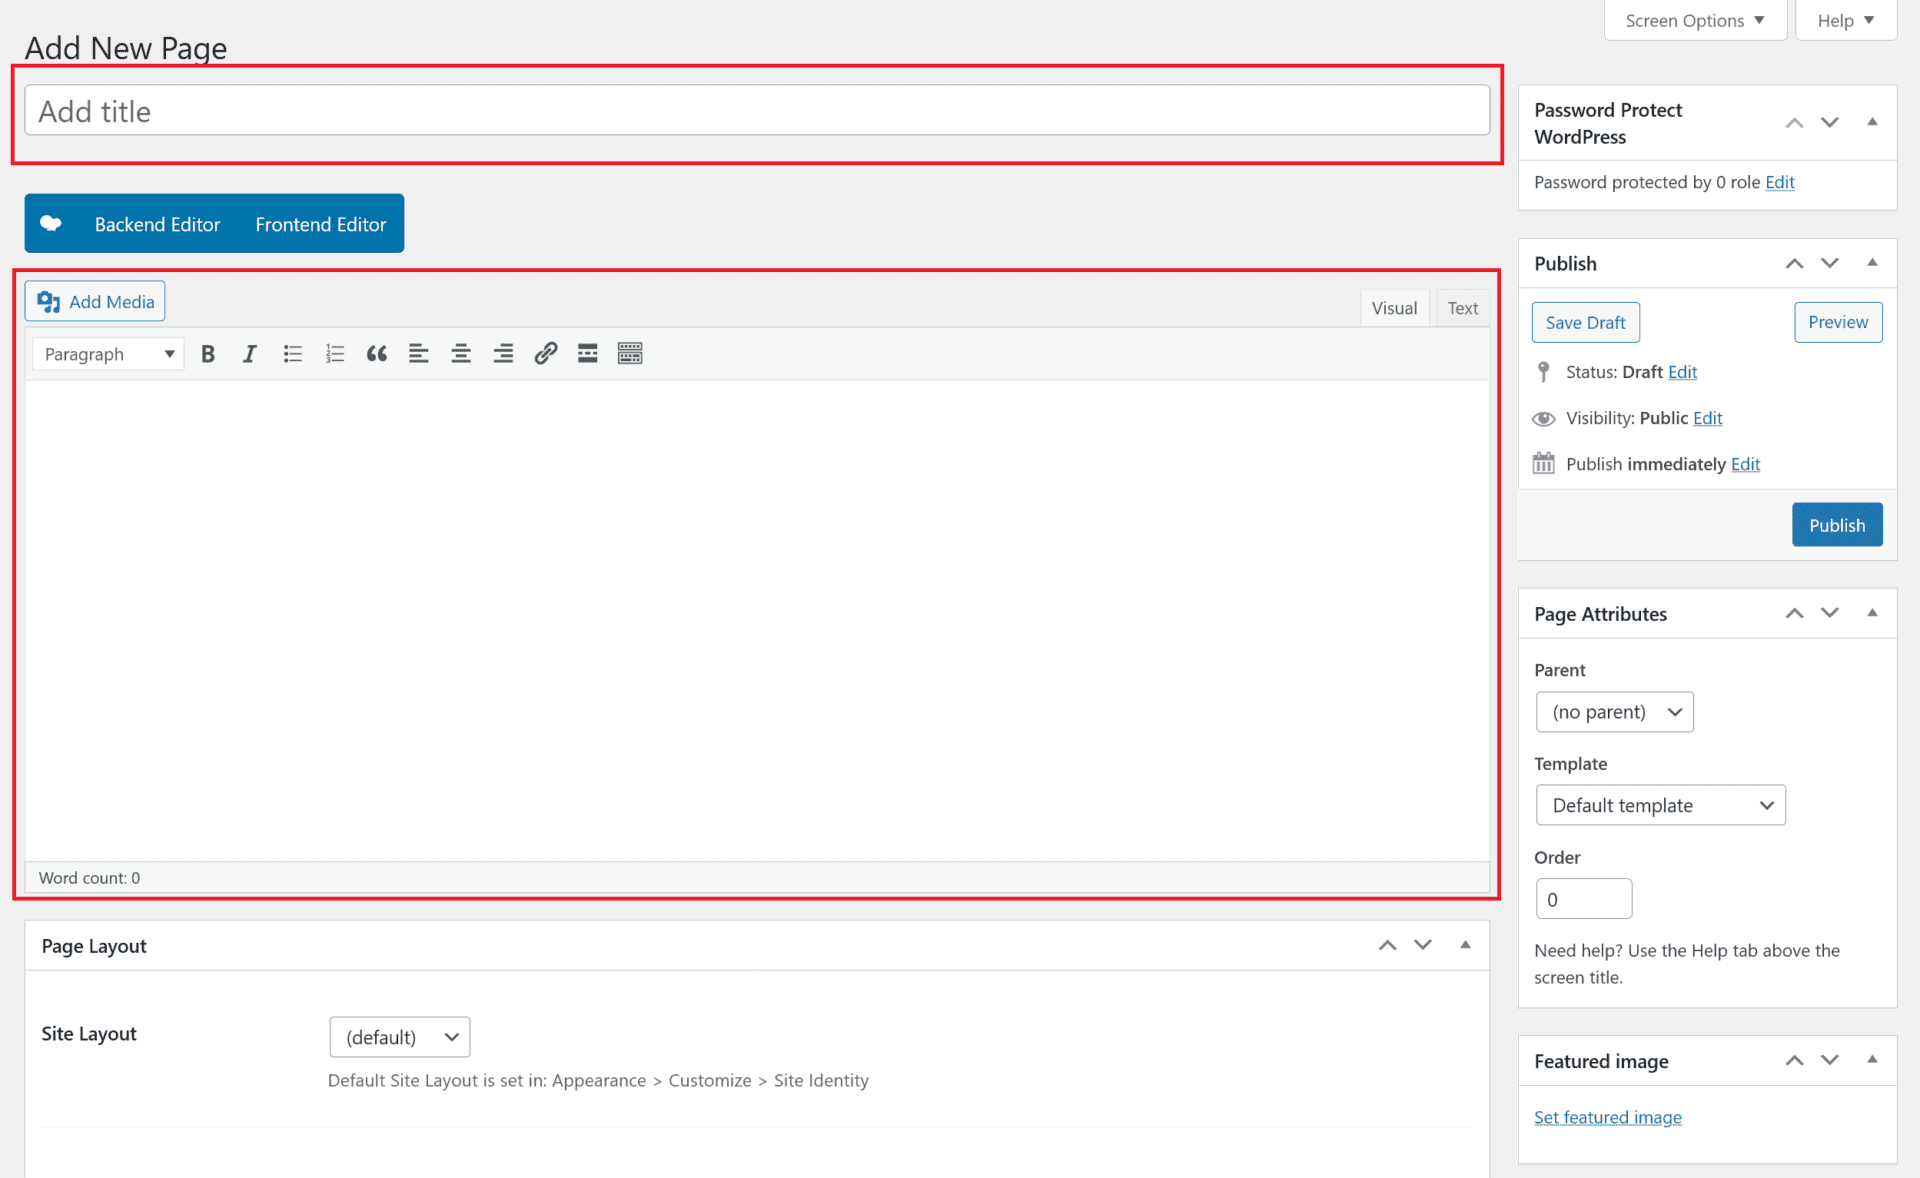
You should now be greeted by the page settings and content setup page. Just under the “Add New Page” text you should find the “Add Title” input field. Type the page title, try to make this as unique as possible, remembering to keep SEO in mind, this is very important for future usage. After you have typed your title click outside the input field and a permalink will be automatically created based on the title you filled in.
If you made an error you can correct the title then click on the “edit” button next to the permalink and delete all the text from inside the permalink input field, then click outside the field, a new permalink will be automatically generated. If you would like more SEO friendly permalinks instead of permalinks like ?533928, follow the how to setup your WordPress website article.
Fill in the page’s content you would like displayed on the page. Try to avoid duplicate content as this negatively effects your SEO scores and website ranking. By default, WordPress comes with the Gutenberg block editor but we recommend WPBakery page builder because of it’s ease of use and support for beautiful templates. Take a look at the Coral WordPress theme that includes the WPBakery drag and drop page builder for free. The Coral theme comes with the essential modules to help you build a beautiful website but if you want even more, you can then extend it with the WPBakery Addons Extension for even more professional modules.
Page Attributes
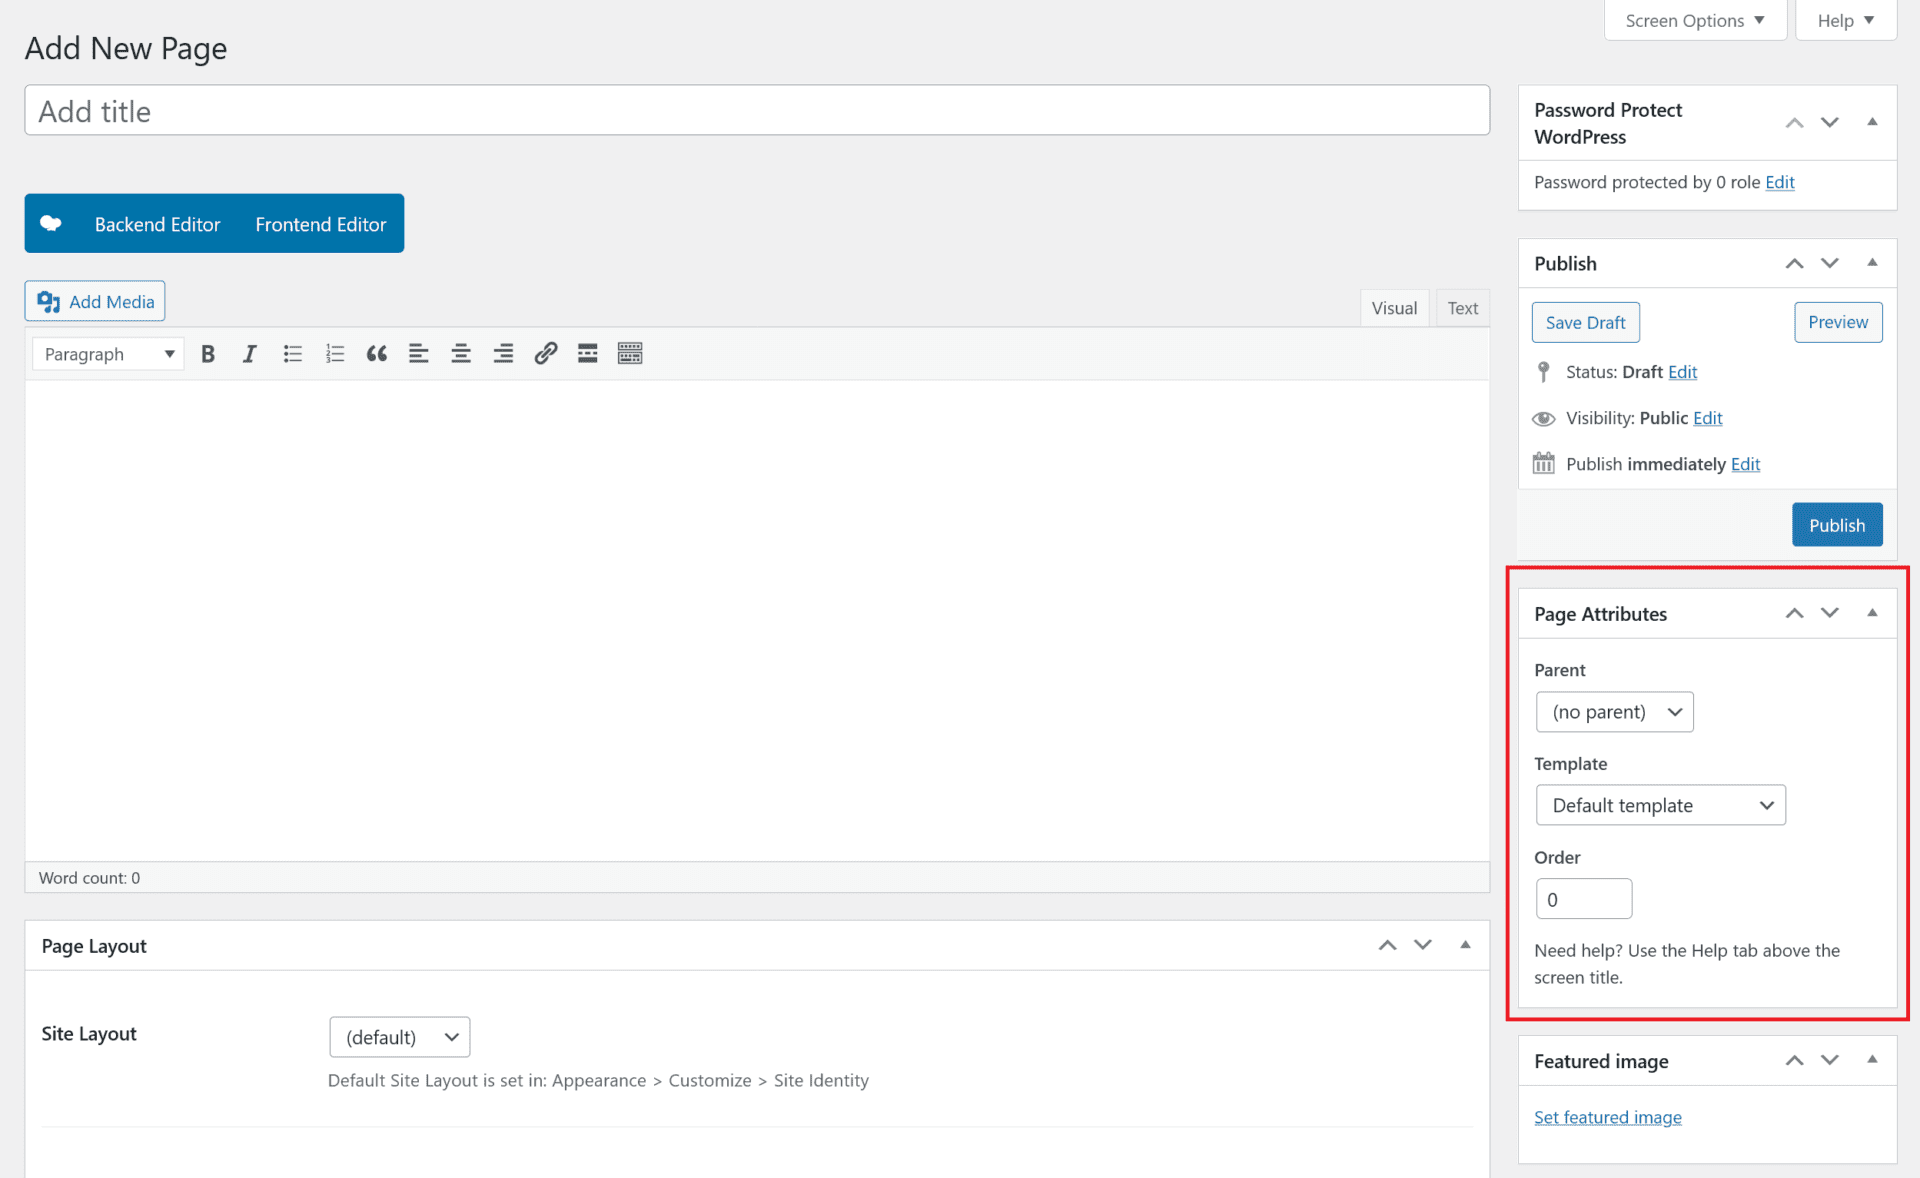
Parent : Use the parent drop-down to set a page parent if you need to create a parent > child – page > sub-page relationship. This is very important if you plant to use breadcrumbs. This improves site navigation and structure.
Template : Select the page template you would like, if you are unsure what this is just leave it as Default template. Page templates can be used to display a different layout than your standard page. This requires you to “save” or “update” the page before you can see any changes. The “Preview Changes” does not work with page templates.
Order : Use this option to manually set the page order . This will effect order in which pages are displayed when automatically loaded via a plugin or site option.
Featured Image

Make sure to set you page’s featured image, this is important for plugins and different widgets and modules on your website that display or list pages. Ideally, you want to make sure all pages use the same dimensions for images. We recommend a resolution of 1280×720 for standard or 1920×1080 for high definition. Keep in mind, high definition images tend to look much better but do slow down your website, slightly.
Page Status
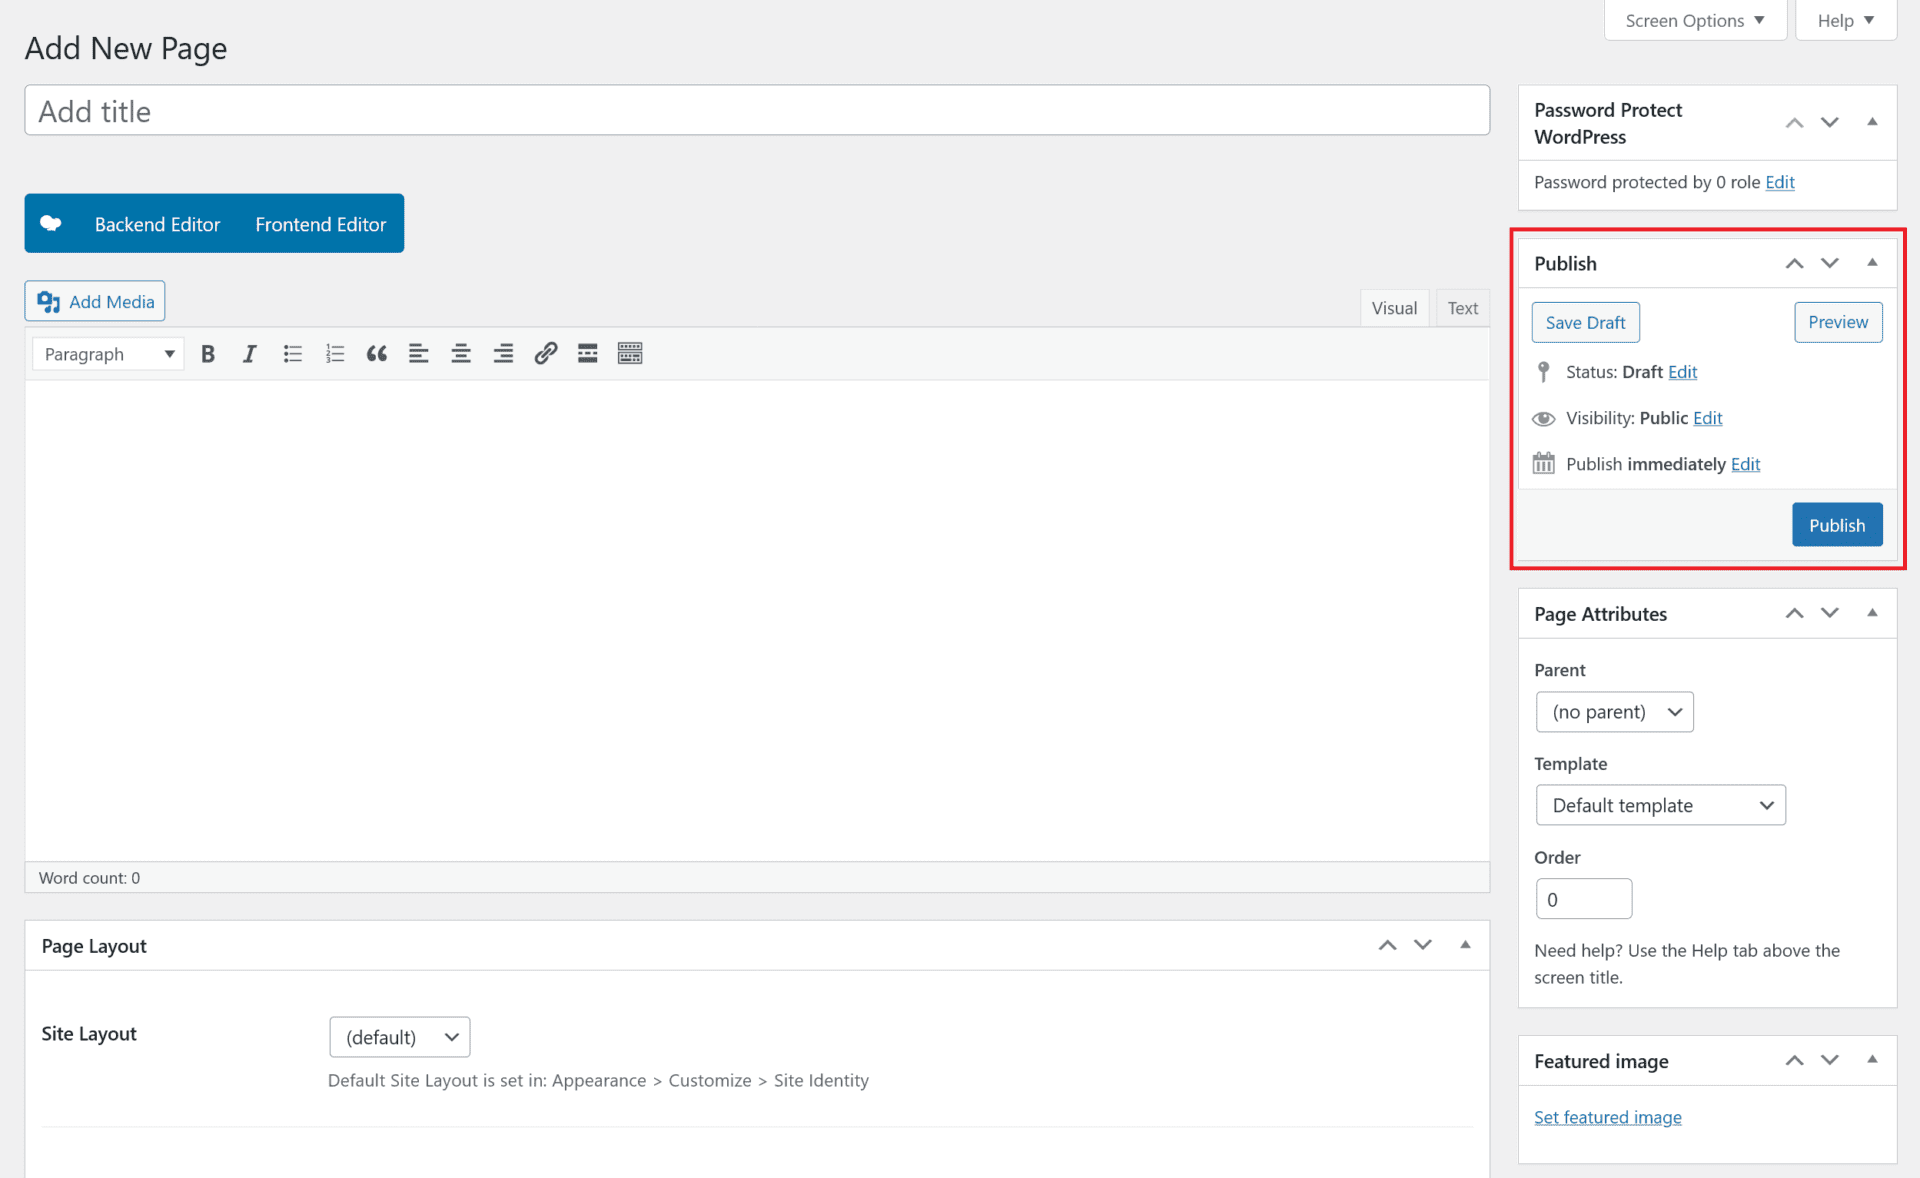
After you have completed the steps below, you can click on the “preview” button to preview your page in a new window. Make sure that you have you pop-up blocker disabled if you have one installed or the preview page will not open. If you are pleased with the results, to make sure your page is live and visible to visitors you need to click on the “publish” button. You also have the option to “save draft” to save the page as a draft or “Visibility” to set the page to private. You can use the “Publish” under “Visibility” next to the calendar icon and choose a specific date the page should go live, by default it’s set to “immediately”.
What should be done after editing your page
Whenever you have made changes to a WordPress page , you want to make sure that all the content is update with the new information and all settings have taken effect on the live site. Start off by emptying your cache if you have a caching plugin enabled and reload the page.
