After installing WordPress, there are a few important steps you have to take to set up your WordPress site. These steps are essential to the functionality and working of your brand new website.
Why you should always setup your WordPress site
Setting up your website will ensure that everything will work according to plan and you encounter less errors. These settings are very important after you have installed your WordPress site. Below you will find a few things you have to set up the main functions.
In this article we’ll discuss how to set up :
- Site permalinks
- General settings
- Reading settings
- Search engine visibility
Before you make any changes
The most important thing to do before making any changes to WordPress is to create a full WordPress backup.
Even if you set up an automatic WordPress backup plugin. You still need to make sure to create a new backup and store it securely in a remote location.
A full WordPress backup includes everything.
- Your WordPress database
- All images and media you upload
- Your WordPress plugins and themes
- Core WordPress files
This step is crucial because it allows you to restore WordPress from a backup in case something goes wrong. Once the full backup is done and saved to another location (your computer or cloud storage like Google Drive), you can continue to the next step.
1. Site Permalinks
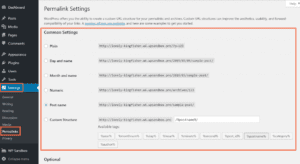
First, log into your WordPress site’s admin panel and go to Dashboard » Settings » Permalinks.
Choose the “Post name” setting, “Post name” is the most recommended structure for permalinks because it fully supports basic and advanced SEO.
After selecting the the “Post name” option (/%postname%/) click on the save button to update your permalinks.
That concludes the process of configuring your WordPress permalinks.
2 . General settings
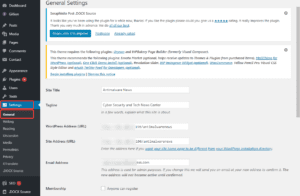
First, log into your WordPress site’s admin panel and go to Dashboard » Settings » General.
The most important of these options is the “Administration Email Address” and “Anyone can register” options. Set the Administration Email Address to “wordpress@yourdomainname.extension” where “yourdomainname” is your actual domain name and “.extension” is your actual extension, for example; wordpress@supercakes.online
Now, make sure the “Anyone can register” is unchecked(disabled) if your website does nod need visitors to register for any functions. This can improve security and reduce the amount of spam you receive.
3 . Reading settings
First, log into your WordPress site’s admin panel. Create a new page, use the name “Home” or something you can recognize later as the home page, then create a blog page with the name “Blog” or something you can recognize later.
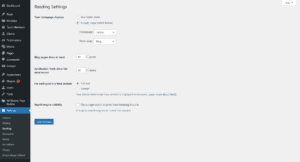
After that, go to Dashboard » Settings » Reading. The most important of these options is the “Your homepage displays” and “Search engine visibility” options, we’ll only be taking a look at these two since the rest does not really effect the functionality of your website. Set the Your homepage displays to “A static page ” and select the “Home” home page we just created as your Homepage, then, select the “Blog” page we just created as you Posts page.
4 . Search engine visibility
Make sure the “Discourage search engines from indexing this site” is unchecked(disabled) to ensure that your website is properly crawled and indexed. Some search engines will still crawl and index if this option is enabled but it’s always best practice to have it disabled on live websites.
What should be done after the changes
Whenever you have made changes to your WordPress on your site, you want to make sure that all the content is update with the new information and all settings have taken effect on the live site. Start off by emptying your cache if you have any caching plugins enabled and reload your home page to test for any bugs or errors that may appear.


